Showing posts with label Nestabilities. Show all posts

Wednesday, February 9, 2011

Mom's Birthday Box

So, now that my mom has actually received the gift, I can post the book box in which I sent her the gift! I saw this idea on Rachel Jakes' blog and I immediately fell in love with it. Thus, I had to give it a go. Rach is an amazing artist/crafter and I love all of her work. Be sure to go to her blog for the link to the tutorial for making the box. And take some time to look at all of her stunning creations and leave some comment love for her while you are there.

Without further ado, here she is, my favorite stamp of the You Are So Special collection (now available at Magnolia-licious).


Tilda has been colored in with copics to match the DP by Stampin Up. The DP is from last year and I don't think it is available any longer but there is one similar to it in pattern (but different colors) that is available. I just love my pinks and purples/plums so I had to have this one when it came out. The solid color cardstock is Rich Razzleberry and Melon Mambo.

Below is the inside of the book box. I have used the Vintage Tag Doohickey die on the front of the pocket on the left side and the Tilda Lace Doohickey die to decorate the box on the right side. Diana is out of the Tilda Lace die at the moment but if you contact her she can probably get it for you. The seam binding was originally white but was died with Glimmer Mists. It is so easy to die this stuff....I may never buy ribbon again. I love the crinkly/shabby look it has when it is done. Here is a tutorial if you'd like to learn how to do this. It is super easy!


The tag inside the pocket was made with one of my favorite Mini Magnolia stamps and Spellbinders Labels 1 dies. She is so versatile. You can use her for any kind of gift giving occasion be it birthday, Christmas, Mother's Day, Father's Day, etc. The sentiment is from Lizzie Anne Designs. I think this set may be retired now.


Inside the box you can see the beads I got for Mom for her birthday. She has one of those bracelets that you can add beads to. I got her a set that is mostly silver but with a little color. By changing out just four beads, she can change the color scheme of the bracelet. Hopefully she will wear it a lot. I know she was over the moon when she called to thank me a couple of days ago. I'm always thrilled when I find something she really likes.
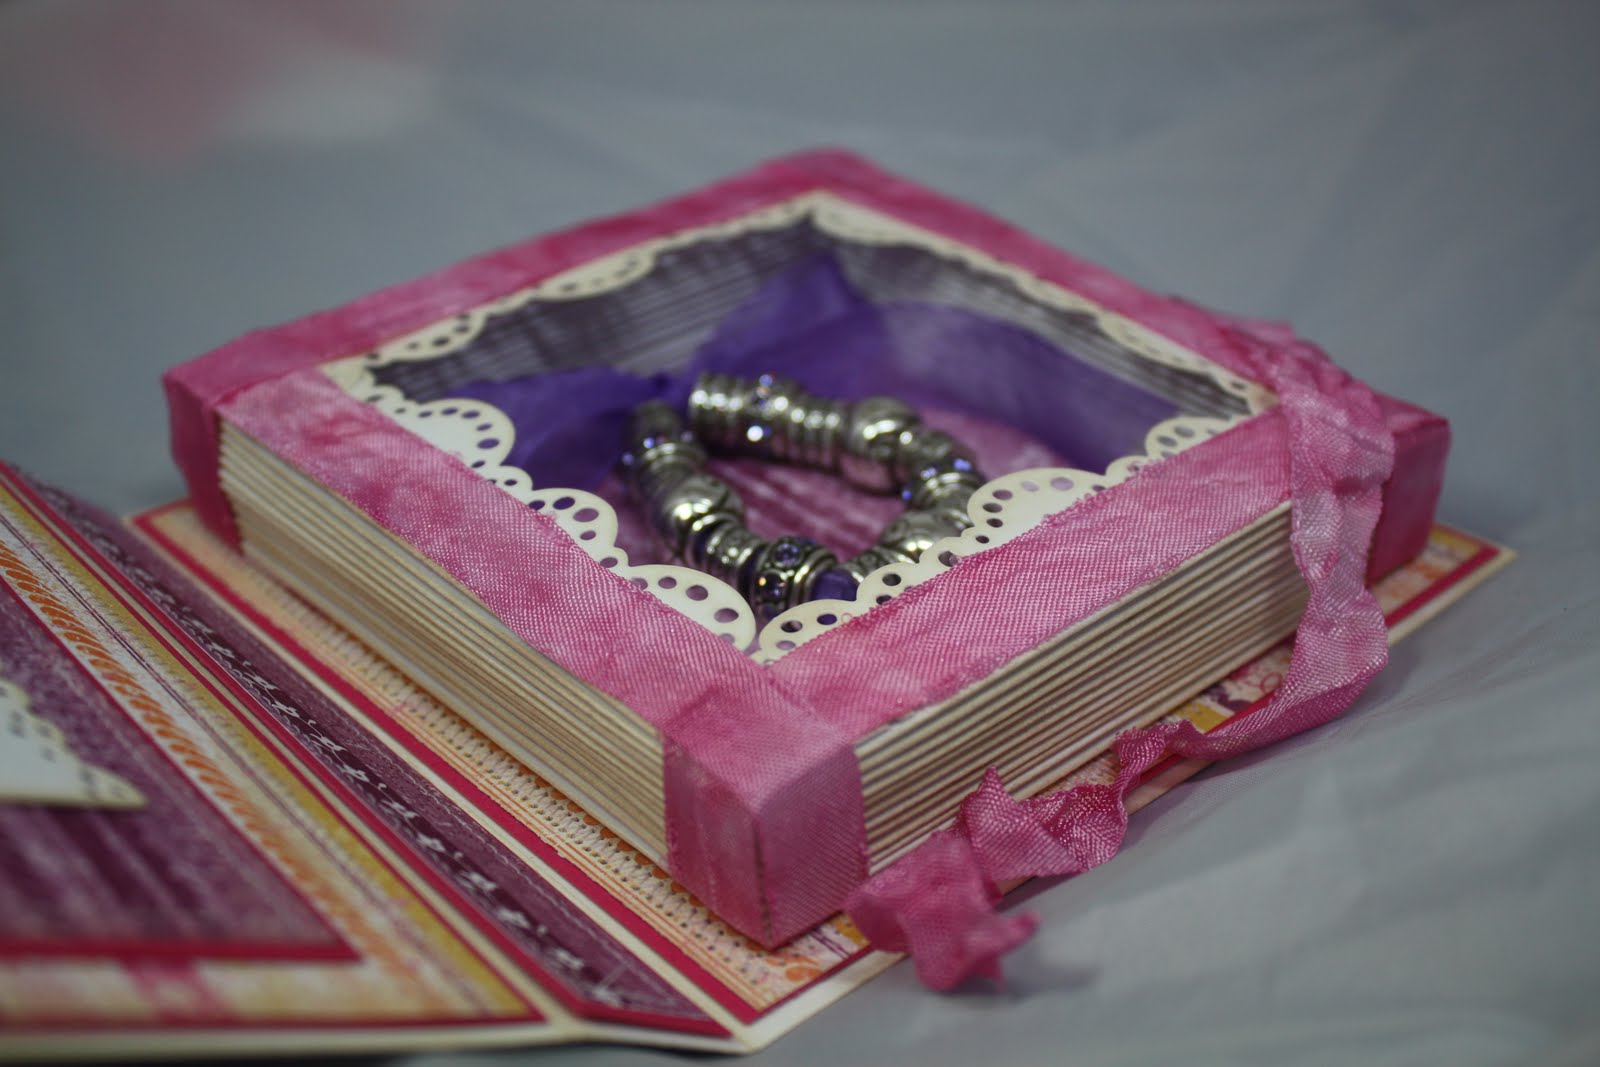

And, finally, the back of the box. I couldn't very well just leave those scraps of pretty plum DP laying on the desk now could I?


I can't wait to make another one of these! Maybe for Easter to put some candy in.......

Cute Little Valentine

Hi everyone! I thought that today I would play along with a few challenges out there. Lots of love/hearts/pink/red going on in my craftroom recently! This little cutie was made with the new Mini-Magnolia stamps available at Magnolia-licious. These little mini's are just the most darling things evah! The whole card here is only 3 1/2 inches square. I have masked Mini Jam Tilda with Mini Tin Boxes for the front of the card. Both of these stamps and many more minis are available at Magnolia-licious. The card is an easel card that has been created with Labels 1 Spellbinders Nestabilities. The image on the front was colored with copics and then misted with Iridescent Gold Glimmer Mist (which doesn't really show well in the photo).


I have kept the inside fairly simple as the card is so small. The sentiment is from a set by Our Craft Lounge called Dr. Pea-nut and is stamped on a die cut made with Scalloped Hearts Nestabilities.

I am entering this card into the following challenges:

Magnolia-licious Challenge: Pink/Black/Red
All That Scraps: Queen of Hearts

Have a wonderful day!


Wednesday, February 2, 2011

i {heart} you - 7 Kids Challenge Entry

The challenge for the next two weeks at 7 Kids College Fund Challenge Blog is i {heart} you which means you have to use hearts somewhere on your project. Lucky for me I just put the finishing touches on this card this morning, and I think it qualifies!

The heart die cut was made from a die by Cottage Cutz (sold out now but they are taking pre-orders on it) at the Scrapping Cottage. I happened onto their site a few months ago and fell in love with the doily heart die. It cuts beautifully. I have used it with both my Big Shot and my Grand Caliber with no issues.


I have been working on painting with Distress Inks (and Stampin Up inks) for the last couple of weeks. I am taking an online class by Angie Hunt through the Color Me Creative Classroom on DI watercoloring. This was my first attempt. Angie makes it look so easy and I suspect with a little more practice it will be. I am still trying to get the hang of shading/shadowing. I know where they are supposed to go and I put them in. However, when I photograph the image, the shadows aren't nearly as dark as they seem to me in person. I think I just need to get more comfortable with more contrast. Do take the time to visit Angie's blog, her creations are absolutely amazing!

Hope everyone is having a wonderful day! We are still snowed in and probaby will be for a few more days. Off to bake some cookies and spend some more time in my craft room!

Tuesday, February 1, 2011

Magnolia-licious Highlites Challenge


The challenge this month over at Magnolia-licious Highlites is to use pink, white, silver, and hearts. Well, after searching through my craftroom, this is what I came up with. I couldn't get out to the store to buy more supplies due to the huge winter storm moving through the area now but I thought it turned out okay considering I was using up scraps.

After inspiration from Kylie, I decided to make a mini-pizza box using a Magnolia stamp called Mini Love Muffin (available from Magnolia-licious). As much as I love the Magnolia stamps, I think I like the mini's even more since I tend to like smaller projects. I thought the little white heart-shaped sprinkles on the muffin went well with the hearts on the DP. After I took my photos I realized that I forgot to put the stickles on the little hearts on the muffin but I have added that now.


I had only one scrap of silver cardstock in my drawers full of paper. I tried to pull the silver out by coloring the muffin wrappter to match. This was also my first experience with seam binding and I am rather liking the shabby look of it. Below the seam binding is a little border created with the Tilda's Lace die (also available at Magnolia-licious).


Of course, I had to then make a matching Valentine's Day card to go inside. Nothing fancy, just a simple card. Using Spellbinders dies makes it easy to whip up a card in a jiffy. Both images (on pizza box and card) were misted with Glimmer Mist but you can't really tell it in the photos. One of these days I'll learn how to take good photos of my projects...


I was considering the possibility of shoveling the driveway but I think for now I'll just head back to my craftroom and play some more! Hope everyone is keeping warm during this storm of the century. =)

Coloring with Copics: muffin wrapper - C1, C3, C5, icing on muffin R81, R83, R85, muffin - Y21, Y23, YR24, halo around muffin - RV00, RV000

Wednesday, September 1, 2010

Princess Tilda Gift Set

This is a little gift set I made for my niece. Most days we refer to her at Princess Parker, mostly because she is the only granddaughter on my side of the family. She gets just a little extra attention....from everyone!


The dress has been colored with copics and then painted with Smooch Illuminate. It looks whiter in the picture that it does in real life. The DP is from Stampin Up and I don't think you can get it anymore. But, I love the colors of this paper....pinks and purples...my faves.


The background for Tilda was airbrushed with a copic but I can't remember which one. Hope you have a great day!

Sunday, August 29, 2010

Tilda with Gifts

I saw a card similar to this one on a blog months ago and loved the look of the Kioshi paper. Thought I'd try my hand at matching the shades of the paper with the copic markers. I used the new Zutter distrezz-it-all to distress the edges of the paper. Sure made quick work of the job!


Have a wonderful day!

Friday, November 20, 2009

Happy Birthday Henry Mouse


This cute little mouse is scurrying away with his cupcake....what a way to celebrate a birthday! When I saw this stamp I just had to have it! My sister makes the cutest little cupcake beads and I thought it would be perfect for the end of a small bookmark that could go right in the card. I have been giving these to some of the birthday girls at work and everyone loves them so far!

The stamp is available at 7 Kids College Fund.
Have a fabulous Friday!

Friday, October 30, 2009

Sweet Tilda

I am such a huge fan of shaped cards! I also love my Magnolia stamps and this little Tilda spoke to me the first time I saw her. That lollipop reminded me of those huge swirly lollipops we used to see at the fair or at the amusement park.....the ones my parents would never buy me. Of course, now I understand why. One bite and they fall completely apart, or one lick and your hair is stuck to it forever! I couldn't resist, I had to go all out on the glitter while I was at it so the pink background, the blue and yellow papers used for the letters, and the polka dot paper are all glittery. This card really, really sparkles in person. Too bad I had to photograph it after dark and indoors....I hate the lighting on this picture.

I used my cricut and SCAL to cut the letters out of blue and yellow glitter paper, then layered them to give more of a shadow effect.

Hope you all have a great weekend and a very sweet and spooky Halloween!


Thursday, October 29, 2009

Clean and Simple Tilda

I made this card Monday after finding a new embossing folder and sanding block at my local scrapbooking store. I just love the shabby-chic look of the sanded paper (coredinations). This stamp was my very first Tilda stamp. It was the beginning of a new addiction! Anyway, after I made it I realized it would be perfect for the Clean and Simple challenge over at Magnolia-licious Highlites.


Magnolia-licious Highlites Easel Card Challange

I loved making this card for the Magnolia-licious Highlites Challenge! I didn't have much time to play but this whipped together pretty quickly, and I love the red/black/white with the cooking theme. Of course, Tilda is just so darn cute, no matter what color you dress her in! I may have to go back and add a sentiment in the bottom right corner though....seems like it could use a little somethin'. I just always like to wait to add the sentiment until I know who I am sending the card to and for what.


I have to apologize for the lighting and background on this photo. I'm getting ready to go on a trip so I had to take photos after dark. The lack of natural light and no time to set up the photo tent really doesn't do anything for the colors of the card!. =(


Sunday, April 19, 2009

First Tag Card

A few weeks ago I was in my morning routine of looking at the twenty-something blogs I follow when I came across this tag card by Carole. I thought these were pretty clever and so decided to take a shot at one. Of course, I probably spent two days just thinking about what kind of card to make and then another day or two collecting papers and such. The hardest part was deciding which of my absolutely darling Magnolia stamps to use! Work always seems to get in the way of the cardmaking too, so it has taken me five days to complete this card. It is a good thing I don't depend on this for an income!

The flowers on the front were made using nestabilities and the leaves were made with a Stampin' Up heart punches. The papers are DCWV (except the peach cardstock), the buttons are from Basic Grey, and the ribbon is from my stash. I used a magnetic closure (also by Basic Grey) to keep the card closed instead of a button, flower, etc.


One of the things I loved about the tag card was that it seemed so flexible for decorating the inside of the card. There was plenty of room for both a sentiment and also to have a white space to write in when it came time to send the card.


Once in a great while I am really pleased with how one of my cards turned out and it is then that I always have a hard time sending it off. Fortunately, my family knows how much time and love I put into each creation and they are always sure to display it for quite a while, and often save it in a box of keepsakes. That is the only reason I can bear to send these off!

I hope you will come back again tomorrow when I tell you how I have managed working around not being able to get my hands on one of those adorable mini-Tilda images that I saw on Claudia's blog!