Sunday, April 10, 2011

Mini Maggie Magnets

Below are my latest round of Mini-Maggie magnets. Here are my favorites on my memo board in my craft room. I made this second round of magnets for the Magnolia-licious Easter-Spring Extravaganza contest. You really need to pop over to the Magnolia-licious Highlites blog and take a look at the projects over there. They are truly amazing!


I fell in love with those Mini Maggies the first time I saw one ages ago on Claudia Rosa's blog. I then spent lots of time figuring out how to "mini-size" my images. I turned to shrink plastic! But now that mini's are readily available at Magnolia Stamps, no need for the plastic anymore.

Some of my very favorite Tilda images are the ones where she is dressed up as a ladybug, butterfy, and bee. Reminds me so much of spring when all of bugs in real life start showing up again. It has been in the 80s/90s the last few days here in Missouri and we are starting to see the flowers bloom. Won't be long until the butterflies, ladybugs, and bees are back.


For the first time, I tried layering prismacolor pencils over the top of my copics. For the most part I like how the coloring turned out. The were super bright initially but I decided that they all needed a coat of Glimmer Mist. And, if one coat was good, two should be great, right? NOT....the second coat really muted the colors. I won't do that again. But one coat worked well. If you look at the picture at the very bottom of this post you will see this round of magnets with some of my very first magnets and you can definitely tell a difference in the brilliance of the colors.


The Tilda as a Bee above was colored with C1, C3, C5, and C7 copics. I have seen her done with the warm greys as well as she is really cute either way. I chose to use the cool greys since I tend to pick cooler colors for most of my artwork.


And, of course the little Tilda below on the left reminds me of how I celebrate when spring is here. I get so tired of the cold and snow. So, I feel as happy as she looks when the warm weather comes back!


I was asked how I made these magnets so I thought I'd share a bit about that. First you start with a piece of 5 ply 1/4" Baltic Birch plywood. I got this piece at a hobby shop. Next, I stamped and colored my Mini Maggie images. I then glued the images to the plywood using Aleene's Tacky Glue. Paint the glue on like you are painting the wood so that it is evenly coated. Press the images onto the wood and make sure you push out any air bubbles. (You can see here how vibrant the colors were before I glimmer-misted). Let dry at least overnight.


Once the glue is dry, I then paint the back of the plywood with three coats of white acrylic paint, sanding between coats. The paint seems to raise up fibers in the wood which is why I sand between coats and after the final coat (lightly). Then, I cut the images out using a scroll saw and sand the edges of the wood pieces with a Dremel tool fit with a sanding tip. Then I sand the edges of the paper again so that they are even with the wood (the Dremel doesn't really sand off paper well).


I apply three coats of white paint to the sides of the magnets using a small brush, again sanding as needed. And finally, I adhere a magnet to the back using superglue. The fronts can be embellished with glimmer mist, stickles, etc. If you like, you can spray the front with a triple-thick gloss spray which will protect the paper on the front of the magnet. (These have not been sprayed).


Definitely not a quick or cheap project considering all of the tools involved, but if you are lucky enough to have access to these tools, it sure is a fun way to see your Maggies every day! I'm thinking about making some into small Christmas ornaments for a tiny lighted tree I got half-price after the holidays this year. Maybe some new Magnolia stamps will show up under my Magnolia Christmas tree next Christmas!

And finally, here are all of this round of magnets along with eight from the first try. Notice how much brighter the ones on the right are (only a light spritz of glimmer mist on those).


Have a wonderful day!

white paper: Beckett Expression Cover from Marcos Papers
coloring: copics/prismacolor pencils
glimmer mist: Iridescent Gold
tools: DeWalt scroll saw, Dremel tool
magnets: Michael's
acrylic paint: Delta

Big Easter Card!

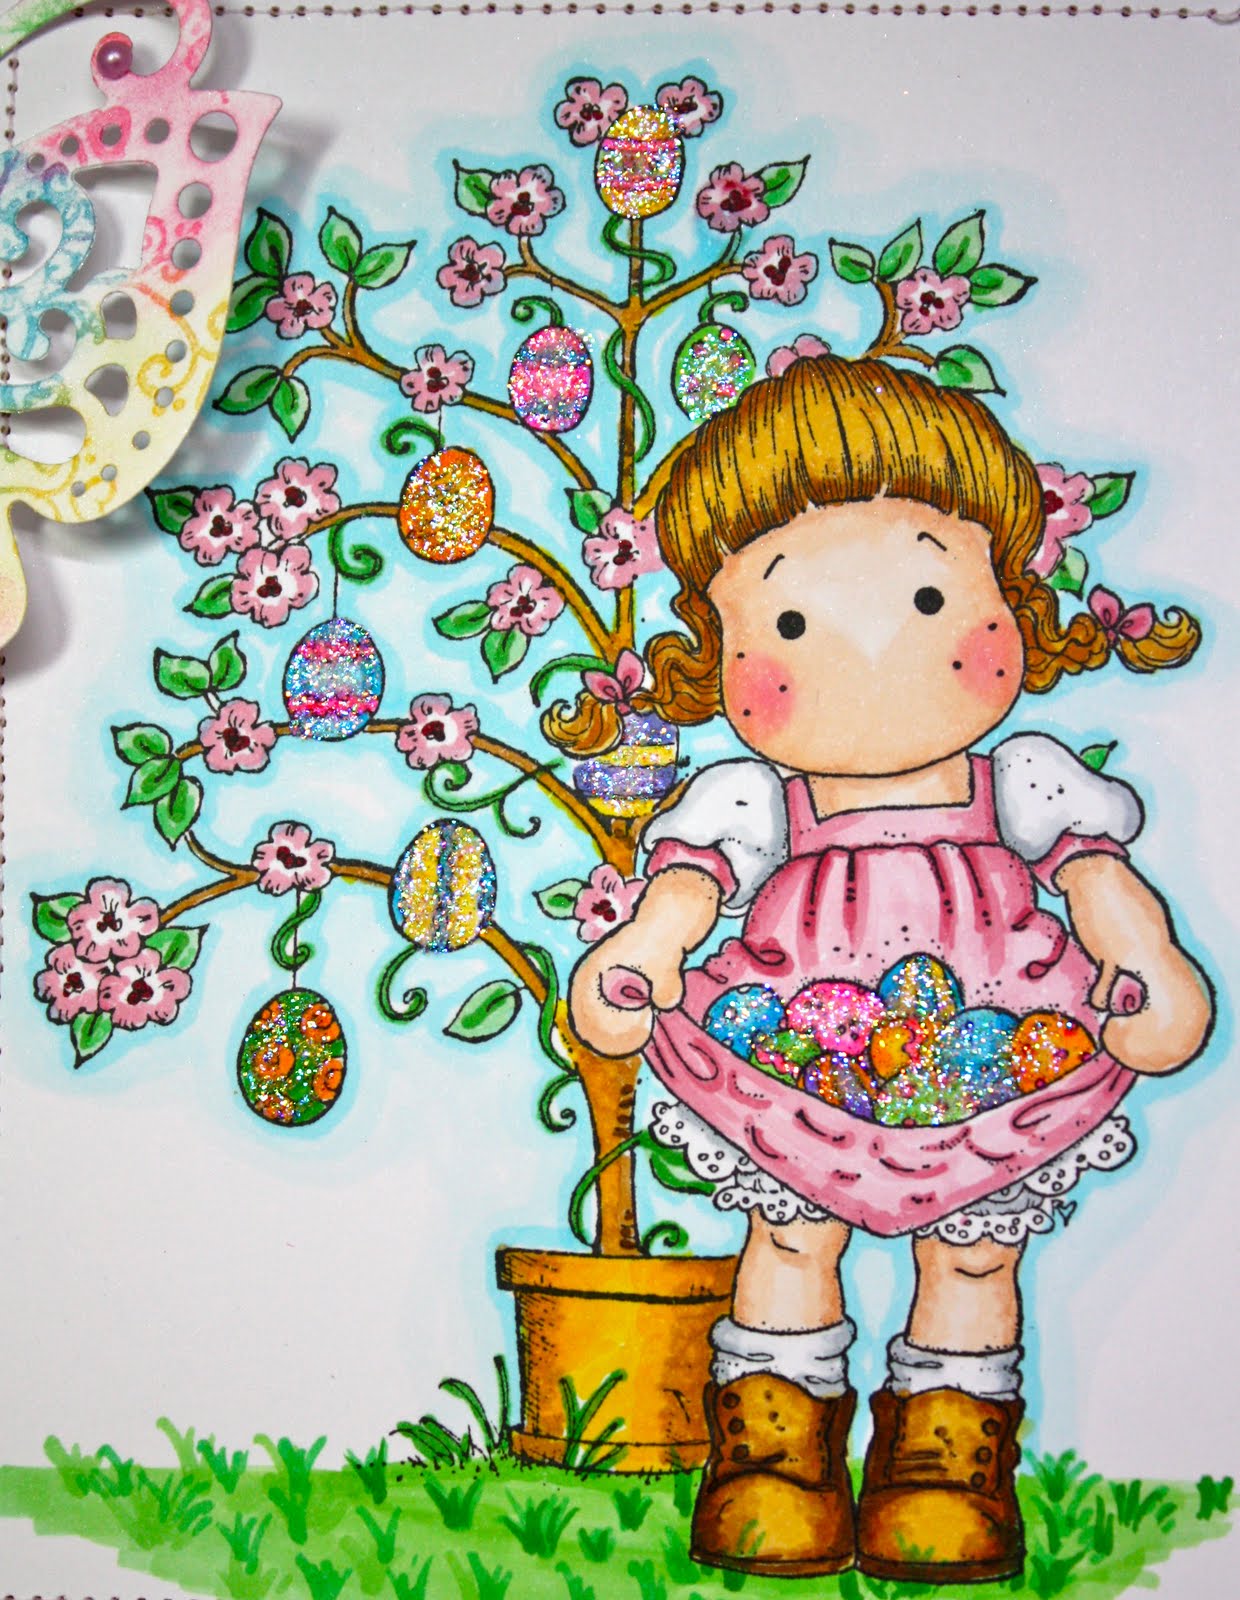
As I remember the conversations from my distant past, it seems that we referred to everything as growing on trees. There was of course the money tree, the chocolate tree, the clothing tree, and many others. Pretty much everything grew on trees. Of course, when I was very little, I believed this! I could not figure out how those darn trees could be blooming and producing anything in the middle of winter. But, because of these memories I absolutely could not resist this egg-tree stamp. And who better to be collecting eggs from it than my very favorite little girl Tilda! She has quite a haul of pretty glittery Easter eggs (milk chocolate on the inside, of course)! This Tilda is available in the mini-version (my card is the full size version) at Magnolia-licious right now. The green paper is also by Magnolia.


This was my first attempt at a grassy background and I am not thrilled with it. I think my left brain took over and tried to make grass sprigs equally placed when they should have been more random. Still working on that one. But for once, I am pleased with how her shoes turned out.....the shading seems so drastic when I'm doing it but it gives a much better result. Thank you to Suzanne Dean for those wonderful online Copic Coloring Classes!


The butterfly was cut from the Ornate Butterfly die from The Scrapping Cottage. They have some really beautiful dies. I then stamped a swirly stamp all over it with Versamark ink and used chalks to add color. The chalks have shimmer to them but it is hard to see that in the picture. I also cut a Spellbinders border and did the same with the Versamark and chalks. The ribbon is white seem binding that has been dyed with Glimmer Mist.


I wanted to keep the card pretty simple so that the focus would be on the colored image on the front. To date this is the largest card I have ever made, about 6.75" by 6.75". Don't know how I'm going to get this one mailed!

This is my official entry into Category #1 of the Magnolia-licious Highlites Easter-Spring Extravaganza Contest. Do take an hour (or three) to peruse all of the other entries for all three categories. There are some really beautiful creations out there!

Have a wonderful day!


Wednesday, February 9, 2011

Mom's Birthday Box

So, now that my mom has actually received the gift, I can post the book box in which I sent her the gift! I saw this idea on Rachel Jakes' blog and I immediately fell in love with it. Thus, I had to give it a go. Rach is an amazing artist/crafter and I love all of her work. Be sure to go to her blog for the link to the tutorial for making the box. And take some time to look at all of her stunning creations and leave some comment love for her while you are there.

Without further ado, here she is, my favorite stamp of the You Are So Special collection (now available at Magnolia-licious).


Tilda has been colored in with copics to match the DP by Stampin Up. The DP is from last year and I don't think it is available any longer but there is one similar to it in pattern (but different colors) that is available. I just love my pinks and purples/plums so I had to have this one when it came out. The solid color cardstock is Rich Razzleberry and Melon Mambo.

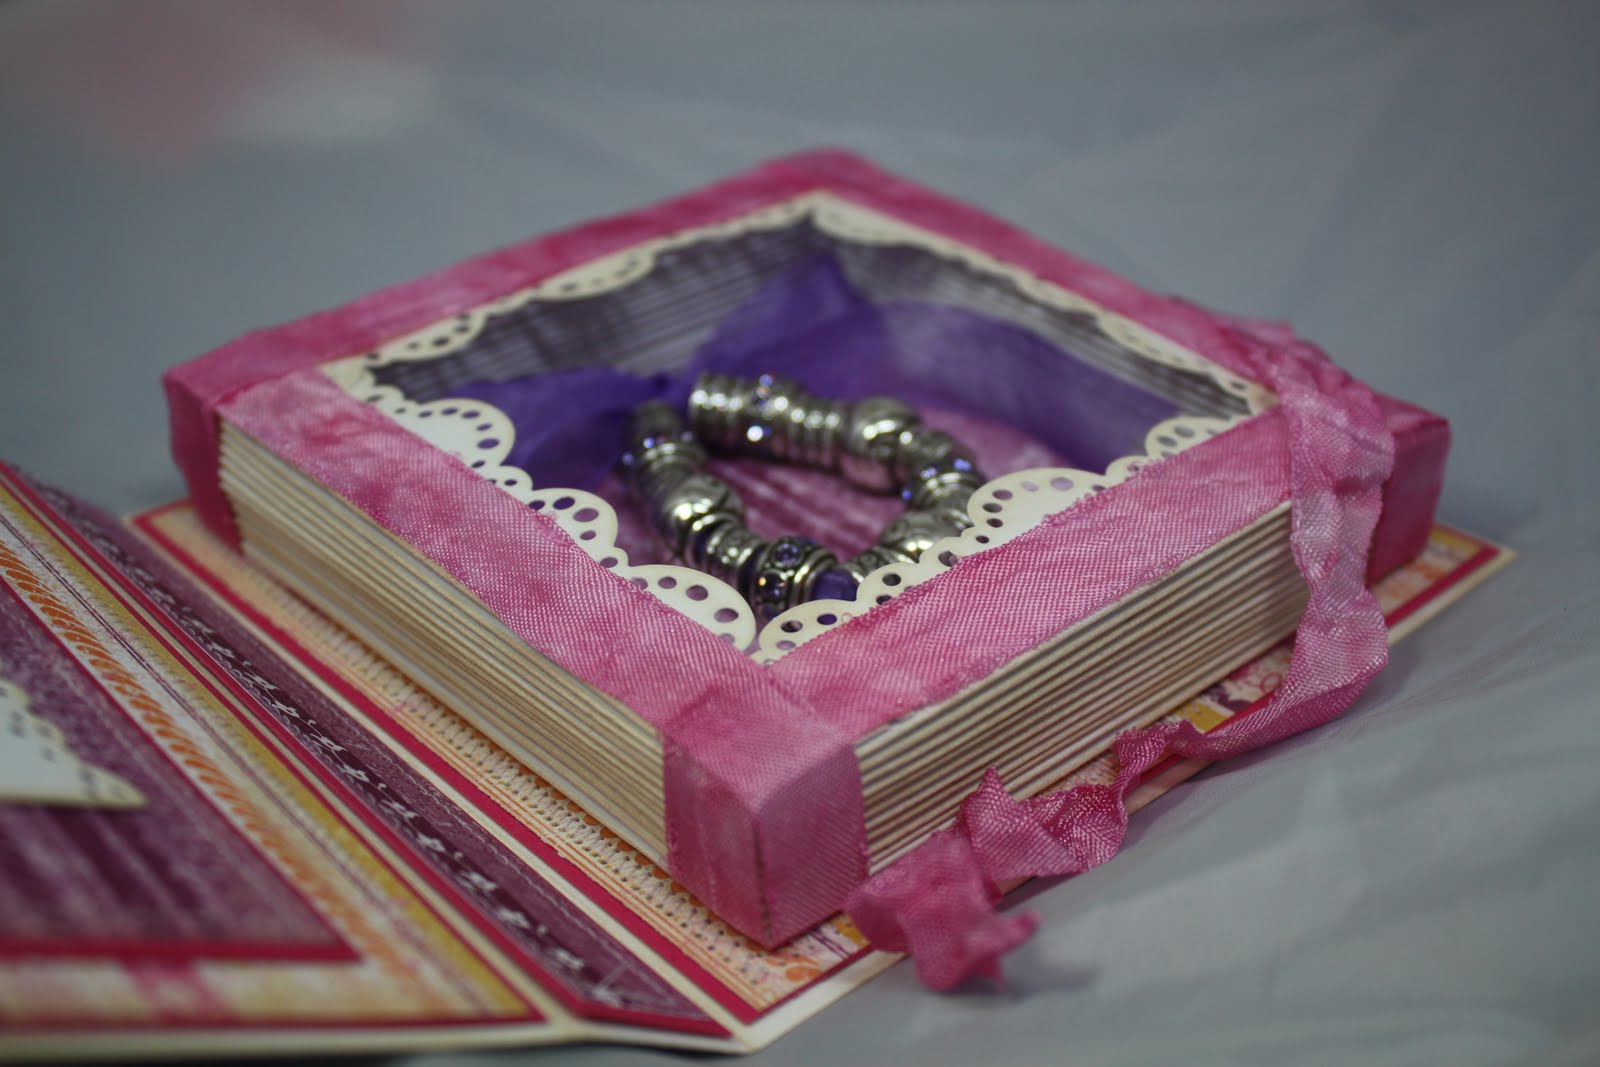
Below is the inside of the book box. I have used the Vintage Tag Doohickey die on the front of the pocket on the left side and the Tilda Lace Doohickey die to decorate the box on the right side. Diana is out of the Tilda Lace die at the moment but if you contact her she can probably get it for you. The seam binding was originally white but was died with Glimmer Mists. It is so easy to die this stuff....I may never buy ribbon again. I love the crinkly/shabby look it has when it is done. Here is a tutorial if you'd like to learn how to do this. It is super easy!


The tag inside the pocket was made with one of my favorite Mini Magnolia stamps and Spellbinders Labels 1 dies. She is so versatile. You can use her for any kind of gift giving occasion be it birthday, Christmas, Mother's Day, Father's Day, etc. The sentiment is from Lizzie Anne Designs. I think this set may be retired now.


Inside the box you can see the beads I got for Mom for her birthday. She has one of those bracelets that you can add beads to. I got her a set that is mostly silver but with a little color. By changing out just four beads, she can change the color scheme of the bracelet. Hopefully she will wear it a lot. I know she was over the moon when she called to thank me a couple of days ago. I'm always thrilled when I find something she really likes.


And, finally, the back of the box. I couldn't very well just leave those scraps of pretty plum DP laying on the desk now could I?


I can't wait to make another one of these! Maybe for Easter to put some candy in.......

Cute Little Valentine

Hi everyone! I thought that today I would play along with a few challenges out there. Lots of love/hearts/pink/red going on in my craftroom recently! This little cutie was made with the new Mini-Magnolia stamps available at Magnolia-licious. These little mini's are just the most darling things evah! The whole card here is only 3 1/2 inches square. I have masked Mini Jam Tilda with Mini Tin Boxes for the front of the card. Both of these stamps and many more minis are available at Magnolia-licious. The card is an easel card that has been created with Labels 1 Spellbinders Nestabilities. The image on the front was colored with copics and then misted with Iridescent Gold Glimmer Mist (which doesn't really show well in the photo).


I have kept the inside fairly simple as the card is so small. The sentiment is from a set by Our Craft Lounge called Dr. Pea-nut and is stamped on a die cut made with Scalloped Hearts Nestabilities.

I am entering this card into the following challenges:

Magnolia-licious Challenge: Pink/Black/Red
All That Scraps: Queen of Hearts

Have a wonderful day!


Wednesday, February 2, 2011

i {heart} you - 7 Kids Challenge Entry

The challenge for the next two weeks at 7 Kids College Fund Challenge Blog is i {heart} you which means you have to use hearts somewhere on your project. Lucky for me I just put the finishing touches on this card this morning, and I think it qualifies!

The heart die cut was made from a die by Cottage Cutz (sold out now but they are taking pre-orders on it) at the Scrapping Cottage. I happened onto their site a few months ago and fell in love with the doily heart die. It cuts beautifully. I have used it with both my Big Shot and my Grand Caliber with no issues.


I have been working on painting with Distress Inks (and Stampin Up inks) for the last couple of weeks. I am taking an online class by Angie Hunt through the Color Me Creative Classroom on DI watercoloring. This was my first attempt. Angie makes it look so easy and I suspect with a little more practice it will be. I am still trying to get the hang of shading/shadowing. I know where they are supposed to go and I put them in. However, when I photograph the image, the shadows aren't nearly as dark as they seem to me in person. I think I just need to get more comfortable with more contrast. Do take the time to visit Angie's blog, her creations are absolutely amazing!

Hope everyone is having a wonderful day! We are still snowed in and probaby will be for a few more days. Off to bake some cookies and spend some more time in my craft room!

Tuesday, February 1, 2011

Magnolia-licious Highlites Challenge


The challenge this month over at Magnolia-licious Highlites is to use pink, white, silver, and hearts. Well, after searching through my craftroom, this is what I came up with. I couldn't get out to the store to buy more supplies due to the huge winter storm moving through the area now but I thought it turned out okay considering I was using up scraps.

After inspiration from Kylie, I decided to make a mini-pizza box using a Magnolia stamp called Mini Love Muffin (available from Magnolia-licious). As much as I love the Magnolia stamps, I think I like the mini's even more since I tend to like smaller projects. I thought the little white heart-shaped sprinkles on the muffin went well with the hearts on the DP. After I took my photos I realized that I forgot to put the stickles on the little hearts on the muffin but I have added that now.


I had only one scrap of silver cardstock in my drawers full of paper. I tried to pull the silver out by coloring the muffin wrappter to match. This was also my first experience with seam binding and I am rather liking the shabby look of it. Below the seam binding is a little border created with the Tilda's Lace die (also available at Magnolia-licious).


Of course, I had to then make a matching Valentine's Day card to go inside. Nothing fancy, just a simple card. Using Spellbinders dies makes it easy to whip up a card in a jiffy. Both images (on pizza box and card) were misted with Glimmer Mist but you can't really tell it in the photos. One of these days I'll learn how to take good photos of my projects...


I was considering the possibility of shoveling the driveway but I think for now I'll just head back to my craftroom and play some more! Hope everyone is keeping warm during this storm of the century. =)

Coloring with Copics: muffin wrapper - C1, C3, C5, icing on muffin R81, R83, R85, muffin - Y21, Y23, YR24, halo around muffin - RV00, RV000

Wednesday, September 1, 2010

Princess Tilda Gift Set

This is a little gift set I made for my niece. Most days we refer to her at Princess Parker, mostly because she is the only granddaughter on my side of the family. She gets just a little extra attention....from everyone!


The dress has been colored with copics and then painted with Smooch Illuminate. It looks whiter in the picture that it does in real life. The DP is from Stampin Up and I don't think you can get it anymore. But, I love the colors of this paper....pinks and purples...my faves.


The background for Tilda was airbrushed with a copic but I can't remember which one. Hope you have a great day!

Sunday, August 29, 2010

Tilda with Gifts

I saw a card similar to this one on a blog months ago and loved the look of the Kioshi paper. Thought I'd try my hand at matching the shades of the paper with the copic markers. I used the new Zutter distrezz-it-all to distress the edges of the paper. Sure made quick work of the job!


Have a wonderful day!

Deb's Awesome Candy

Deb is offering some wonderful candy on her blog. It includes some of those scrummy hAngler and stAnglar stamps that are soooo hard to get. Check out the link here.

Friday, November 20, 2009

Happy Birthday Henry Mouse


This cute little mouse is scurrying away with his cupcake....what a way to celebrate a birthday! When I saw this stamp I just had to have it! My sister makes the cutest little cupcake beads and I thought it would be perfect for the end of a small bookmark that could go right in the card. I have been giving these to some of the birthday girls at work and everyone loves them so far!

The stamp is available at 7 Kids College Fund.
Have a fabulous Friday!

Thursday, November 19, 2009

Butterfly Tilda


This dreary weather really has me wishing for spring (okay, maybe early summer) and butterflies. Here is my favorite girl, Tilda, sporting her butterfly wings. Doesn't she just look like a cute little bug ready to fly away! The image was stamped with Memento Tuxedo Black and colored with copics. The paper and buttons are Basic Grey and the border punch is Stampin' Up.
You can find the image at Magnolia-licious store. Diana is the best and her new store is really cool! You can also find some really good tutorials on her first site. And, there are some awesome ideas to try at the Magnolia-licious Highlights blog. Be sure to take a look at all three!


Wednesday, November 18, 2009

Mod Teen Card


I made this card from a set by My Favorite Things (I think). It has that "you go girl" attitude to it.....just like some of the teenagers I teach every day! I love pink paired with black so these papers were right up my alley. Wishing all of you a wonderful Wednesday!

Tuesday, November 17, 2009

Funny Bunny


Don't you just love this cute little bunny. Usually bunnies make me think of Easter but this one is just cute in a non-Eastery sort of way. This also makes me think of nice bright sunny days, the opposite of the weather we are having here this week. Have a cheery Tuesday!

Monday, November 16, 2009

Playful Kitty

This stamp is an old stamp that I haven't inked up in a while. I just love how the kitty looks like it has been out playing and getting into everything all afternoon....makes me think of my cat Suki. He is thoroughly rotten, and has claimed my son rather than me. That's okay, I don't mind that Chris gets licked in the face every morning instead of me!


The cute kitty stamp is available at 7 Kids College Fund.
Hope you all have a wonderful day!

Friday, October 30, 2009

Sweet Tilda

I am such a huge fan of shaped cards! I also love my Magnolia stamps and this little Tilda spoke to me the first time I saw her. That lollipop reminded me of those huge swirly lollipops we used to see at the fair or at the amusement park.....the ones my parents would never buy me. Of course, now I understand why. One bite and they fall completely apart, or one lick and your hair is stuck to it forever! I couldn't resist, I had to go all out on the glitter while I was at it so the pink background, the blue and yellow papers used for the letters, and the polka dot paper are all glittery. This card really, really sparkles in person. Too bad I had to photograph it after dark and indoors....I hate the lighting on this picture.

I used my cricut and SCAL to cut the letters out of blue and yellow glitter paper, then layered them to give more of a shadow effect.

Hope you all have a great weekend and a very sweet and spooky Halloween!


Thursday, October 29, 2009

Clean and Simple Tilda

I made this card Monday after finding a new embossing folder and sanding block at my local scrapbooking store. I just love the shabby-chic look of the sanded paper (coredinations). This stamp was my very first Tilda stamp. It was the beginning of a new addiction! Anyway, after I made it I realized it would be perfect for the Clean and Simple challenge over at Magnolia-licious Highlites.


Magnolia-licious Highlites Easel Card Challange

I loved making this card for the Magnolia-licious Highlites Challenge! I didn't have much time to play but this whipped together pretty quickly, and I love the red/black/white with the cooking theme. Of course, Tilda is just so darn cute, no matter what color you dress her in! I may have to go back and add a sentiment in the bottom right corner though....seems like it could use a little somethin'. I just always like to wait to add the sentiment until I know who I am sending the card to and for what.


I have to apologize for the lighting and background on this photo. I'm getting ready to go on a trip so I had to take photos after dark. The lack of natural light and no time to set up the photo tent really doesn't do anything for the colors of the card!. =(


Sunday, April 19, 2009

First Tag Card

A few weeks ago I was in my morning routine of looking at the twenty-something blogs I follow when I came across this tag card by Carole. I thought these were pretty clever and so decided to take a shot at one. Of course, I probably spent two days just thinking about what kind of card to make and then another day or two collecting papers and such. The hardest part was deciding which of my absolutely darling Magnolia stamps to use! Work always seems to get in the way of the cardmaking too, so it has taken me five days to complete this card. It is a good thing I don't depend on this for an income!

The flowers on the front were made using nestabilities and the leaves were made with a Stampin' Up heart punches. The papers are DCWV (except the peach cardstock), the buttons are from Basic Grey, and the ribbon is from my stash. I used a magnetic closure (also by Basic Grey) to keep the card closed instead of a button, flower, etc.


One of the things I loved about the tag card was that it seemed so flexible for decorating the inside of the card. There was plenty of room for both a sentiment and also to have a white space to write in when it came time to send the card.


Once in a great while I am really pleased with how one of my cards turned out and it is then that I always have a hard time sending it off. Fortunately, my family knows how much time and love I put into each creation and they are always sure to display it for quite a while, and often save it in a box of keepsakes. That is the only reason I can bear to send these off!

I hope you will come back again tomorrow when I tell you how I have managed working around not being able to get my hands on one of those adorable mini-Tilda images that I saw on Claudia's blog!

Sunday, March 29, 2009

Friend Tilda

Can you tell I am on a Tilda streak here! Such darling stamps......I think I need them all. Unfortunately the pocket book doesn't think so. =) They should be in over at 7 Kids College Fund any day now. Meanwhile I patiently wait. I love the colors of the DP on the top layer of the card. Both DP are Two Scoops by BasicGrey. The "friend" stamp is by Hero Arts (part of a 4 pack). Plain cardstock is by Stampin Up but I'm not sure what colors.


The DP on the inside of the card is also Two Scoops by Basic Grey. The sentiment is by Whipper Snapper Designs (unfortunately not an angel company). However, since I really don't sell any cards for me it doesn't matter.


I gotta tell ya that the colors of this card remind me so much of my sister's living room before she redid it. She used to have a teal colored leather couch that was so comfy....you could just sink down into it and sleep there for hours, although I never did. I suspect she did though!

Saturday, March 28, 2009

Shout Out to my Spruce Creek Friends

Every week on Saturday morning I wake up thinking about a wonderful group of people I have been fortunate enough to get to meet and become friends with. You see, every Saturday morning, this group gets together and flies out to breakfast. And I don't mean flies as in a "big old jet airliner" like the Steve Miller Band sang about years ago, I mean flies out Blue Angels style as in the picture below. These folks are some of the neatest people I have ever had the pleasure of meeting. They are kind and generous beyond belief! Your plane is being worked on.....no problem, ride with me (typical for these pilots). So this Saturday morning I thought I would feature these amazing pilots on my blog. This picture was taken on one of those typical Saturday morning fly outs for breakfast. This is the Whiskey flight and on this particular morning my son, Chris, was invited to fly out to breakfast with this group! He is in the Harmon Rocket, the plane furthest to the right in the photo. What an amazing experience for anyone, let alone a 14 year old boy! .


You see, my son Chris has loved airplanes since he was old enough to get in one at the age of 9 months when he flew to Germany with us to visit my parents who were living there at the time. Since then. he has talked constantly about becoming a pilot. He has been so fortunate to get to fly with his Opa (my dad) and several other pilots (Medford, Jerry, Frank, Keith, and Tony). Each one took their time not only to take Chris in their plane but also took the time to explain their particular airplane to him. And, to top it off, our friend Medford has spent several hours in the simulator with Chris (and John and me) teaching him about flying. We are so very blessed to call these people friends! Below is a picture of Medford (center) giving my brother-in-law, Mike, a lesson on the simulator while my son looks on.


And, my son is not the only one who has been fortunate enough to experience flights and lessons with these wonderful folks! My husband and I have also ridden along with several of these folks as well (Keith, Tony, Dad, Jerry, Steve). In fact, it was Keith who is really responsible for getting me into this whole aviation thing. I flew with Keith in a Great Lakes in June of 2006 and that is when I made up my mind I had to do this too! That was one amazing ride! I had another really wonderful experience when I had my first formation flight lesson over Christmas break this year. Larry was so patient with me as I took my first lesson. He was an excellent teacher and I so appreciated his patience with me! Below is a picture of Larry and me in my plane during my first formation flight lesson taken from the lead plane (my dad). I was flying just off my father's wing.......what a dream! Too bad you can't see his plane in the photo.


So for all you Spruce Creek folks out there, please know that at least one family (and many more I'm sure) think you are amazing people and appreciate all you do for us and for our family!!!